Controlling Captivate – ShowHide
February 9, 2016
Controlling Captivate – Change Cursor
October 9, 2016When designing and/or developing courses do you ever find yourself wondering how to create a fresh approach to interactivity? Do you find yourself falling back on your set of “old faithful’s” or the question templates you have available? Do you feel pressured to hurry up and get it done instead of having the freedom to tap into your creativity, do research, etc. in hopes of finding new ways to engage your audience? I think the majority of us, whether we’re new to the field or we’ve been at it for years, can easily answer YES to all of the above. The good news is there is hope for us and Adobe Captivate 9, eLearning Brothers, and a little bit of creative thinking make it not only possible, but quick and easy to implement too!
If you haven’t upgraded to Captivate 9 yet or you haven’t previously used the eLearning Brothers Captivate templates, consider yourself lucky because you have something new to get excited about!!! If you’re already using Captivate 9 and/or you’ve used the eLearning Brothers templates before, then you can relate. In the past, you had to purchase these templates or a subscription separately, and while the prices were reasonable, it was still an extra cost and you had to access and download the templates from the eLearning Brothers site. Now you have access from within the Captivate 9 interface. Captivate 9 includes the eLearning Brothers templates for you and they’re included in the price when you upgrade or buy Captivate 9. This is a pretty big bonus for Captivate users and a strong justification for upgrading if you haven’t yet. Let’s check it out:
Quickly find a template that works for your course
Let’s say I’m using the interface shown below for my course. I want to provide a knowledge check to ensure my students understand the fundamentals of conducting a Time & Motion Study. I don’t want to use a standard multiple-choice question and I also want to make sure it works aesthetically with my existing interface and concept. Since this is a scenario-based course, I’d like my knowledge checks to also be scenario-based.
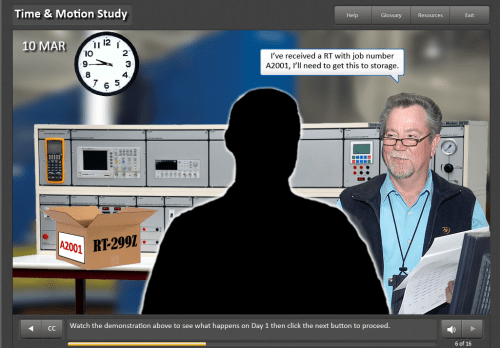
TLC Media Design Captivate Interface
In Captivate 9, I can click the Assets button to view the included templates and choose one that meets my requirements. You have categories to choose from (e.g., Games, Cutout People, Interactions, and more). As you can see below, there are many different scenario templates I can choose from.
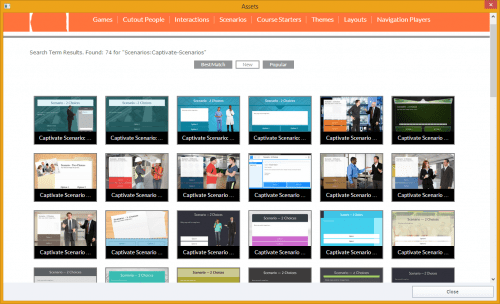
Elearning Brothers selection screen.
Once you decide on a template, you can hover over the thumbnail to view the details. This allows you to ensure it includes the components you need and/or allows you to customize the template based on your requirements.
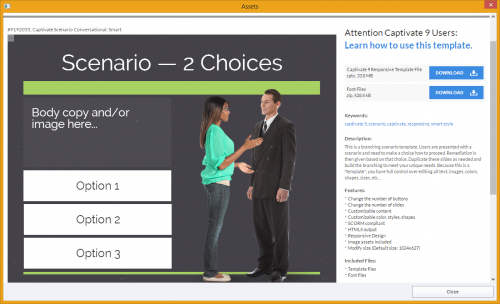
Elearning Brothers Template
From this screen you have the ability to test the demo to see how it works, click the Learn how to use this template link for additional information, verify the customizable features, and any software version requirements. Note: Many of the templates work for Captivate 6, 7, 8 and/or 9 which is great if you’re using multiple versions of the software for various clients, etc. If specific fonts are used, a font file is also provided. Then just click the Download buttons to download the files to your computer. After you complete the download(s), this is where the process gets a bit clunky, in my opinion, but it’s still fairly quick once you get used to it.
The template and asset files are downloaded to various locations on your PC. See below for a list of locations.
Cut-out Characters (.png files) are located in the main Captivate ribbon via the Media/Characters buttons. If you download additional characters, they are found in the Assets folder.
Games, Layouts, Interactions, Scenarios, Navigation Players (.cptx files) are downloaded to your Sample Projects folder. You have to locate them in this folder, double-click to open them in Captivate, or you can cut/paste to a different location. According to the instructions in the How to use this template link, Window users will need to look in the Elearning Assets/SampleProjects folder. If you’re using a Mac, you’ll need to search the My Adobe Captivate Projects/SampleProjects folder. Note: This directory path was not true for me. My files were located in c: users\public\public documents\adobe\eLearning Assets\Sample Projects folder. If the paths provided by Adobe/eLearning Bros aren’t accurate for you, you can do a global search for *.cptx files on your computer.
Themes (.cptm files) can be found by going to the main Captivate ribbon and clicking on the Themes button. Your downloaded themes are in the list.
Other file types (.ppt, .zip, .ttf, etc.) including any assets that are not characters, .cptx or .cptm files, are downloaded to your Others folder. Access them from there. Windows – Elearning Assets / Others folder. Mac - My Adobe Captivate Projects / Others folder. Again, these may not be the correct paths for you so you may have to search elsewhere if you can’t locate them.
I would love to see the templates, characters, and other assets automatically launch after you select them instead of being required to hunt for the applicable file and then open in Captivate; however, this still isn’t terribly time-consuming once you determine where the files are downloaded on your individual computer.
Customizing the Template
Once you’ve located the downloaded file(s), I highly recommend either copying/pasting or cutting/pasting to a folder within your course directory structure so they’re easier to find if you need to reuse in the course. You can either double-click on the file name to launch or use the File|Open menu option in Captivate. The template will open as a separate file. This is another clunky aspect if you ask me but this is the way it works for now.
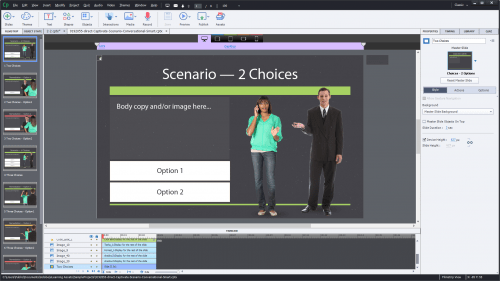
Elearning Bothers template in Adobe Captivate
The next thing you need to do is copy/paste the slides you want to use from the template file to your working course file so you can customize. Or, if you might use this template multiple times in your course, you could also choose to customize this file and save it as a template. Then you would open this file, copy/paste applicable slides to your lesson file for each interaction.
I have found it is best to copy and paste slides vs. individual elements on the timeline to ensure everything you may need for the interactive components are included. Don’t forget that you can swap out the cutout figures, change colors, text, customize buttons, etc. so it works with your existing interface. The example below shows how the template was customized to work with my interface, my images, and the text I wanted to use for the scenario. Really quick and really easy to do. Literally took just a few minutes to customize; however, if you need to add, delete, and/or revise functionality it will obviously take a bit longer to finalize.
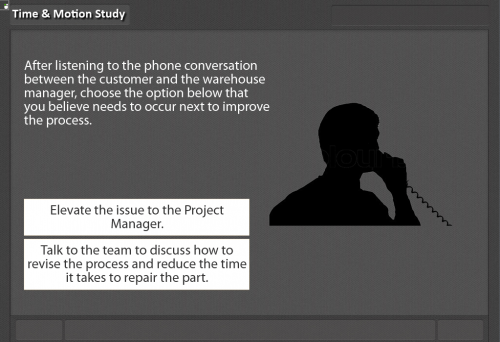
TLC Media Design interface.
Sparking Your Creativity
Can’t find a template that will work? No worries, you can also use parts and pieces of templates to create your own. For example, you can download multiple template files and use only what you want to create your own custom template. Use a background image from one, buttons from another, and characters from yet another if you want. Then save the file and voila, you’ve just created your own template that you can use in your courses.
You can also generate ideas for branching scenarios, how to simulate a conversation, or different color schemes that work well by taking some time to review the various templates and play with the demo versions to see how they work. Sometimes all you need to generate a new idea is to look at other examples and before you know it, innovation happens!
We hope you find this information helpful if you’re trying to decide whether you should upgrade and/or purchase Captivate 9. Aside from the other enhancements, we think the addition of the eLearning Brothers templates in this version is an awesome perk. If you haven’t done so already, don’t forget to sign up for access to all of FREE TLC Media Design resources by clicking the button below.

